

Docs/ Custom Migrator
Export and push
The page
Open Custom Migrator from the awesome bar.
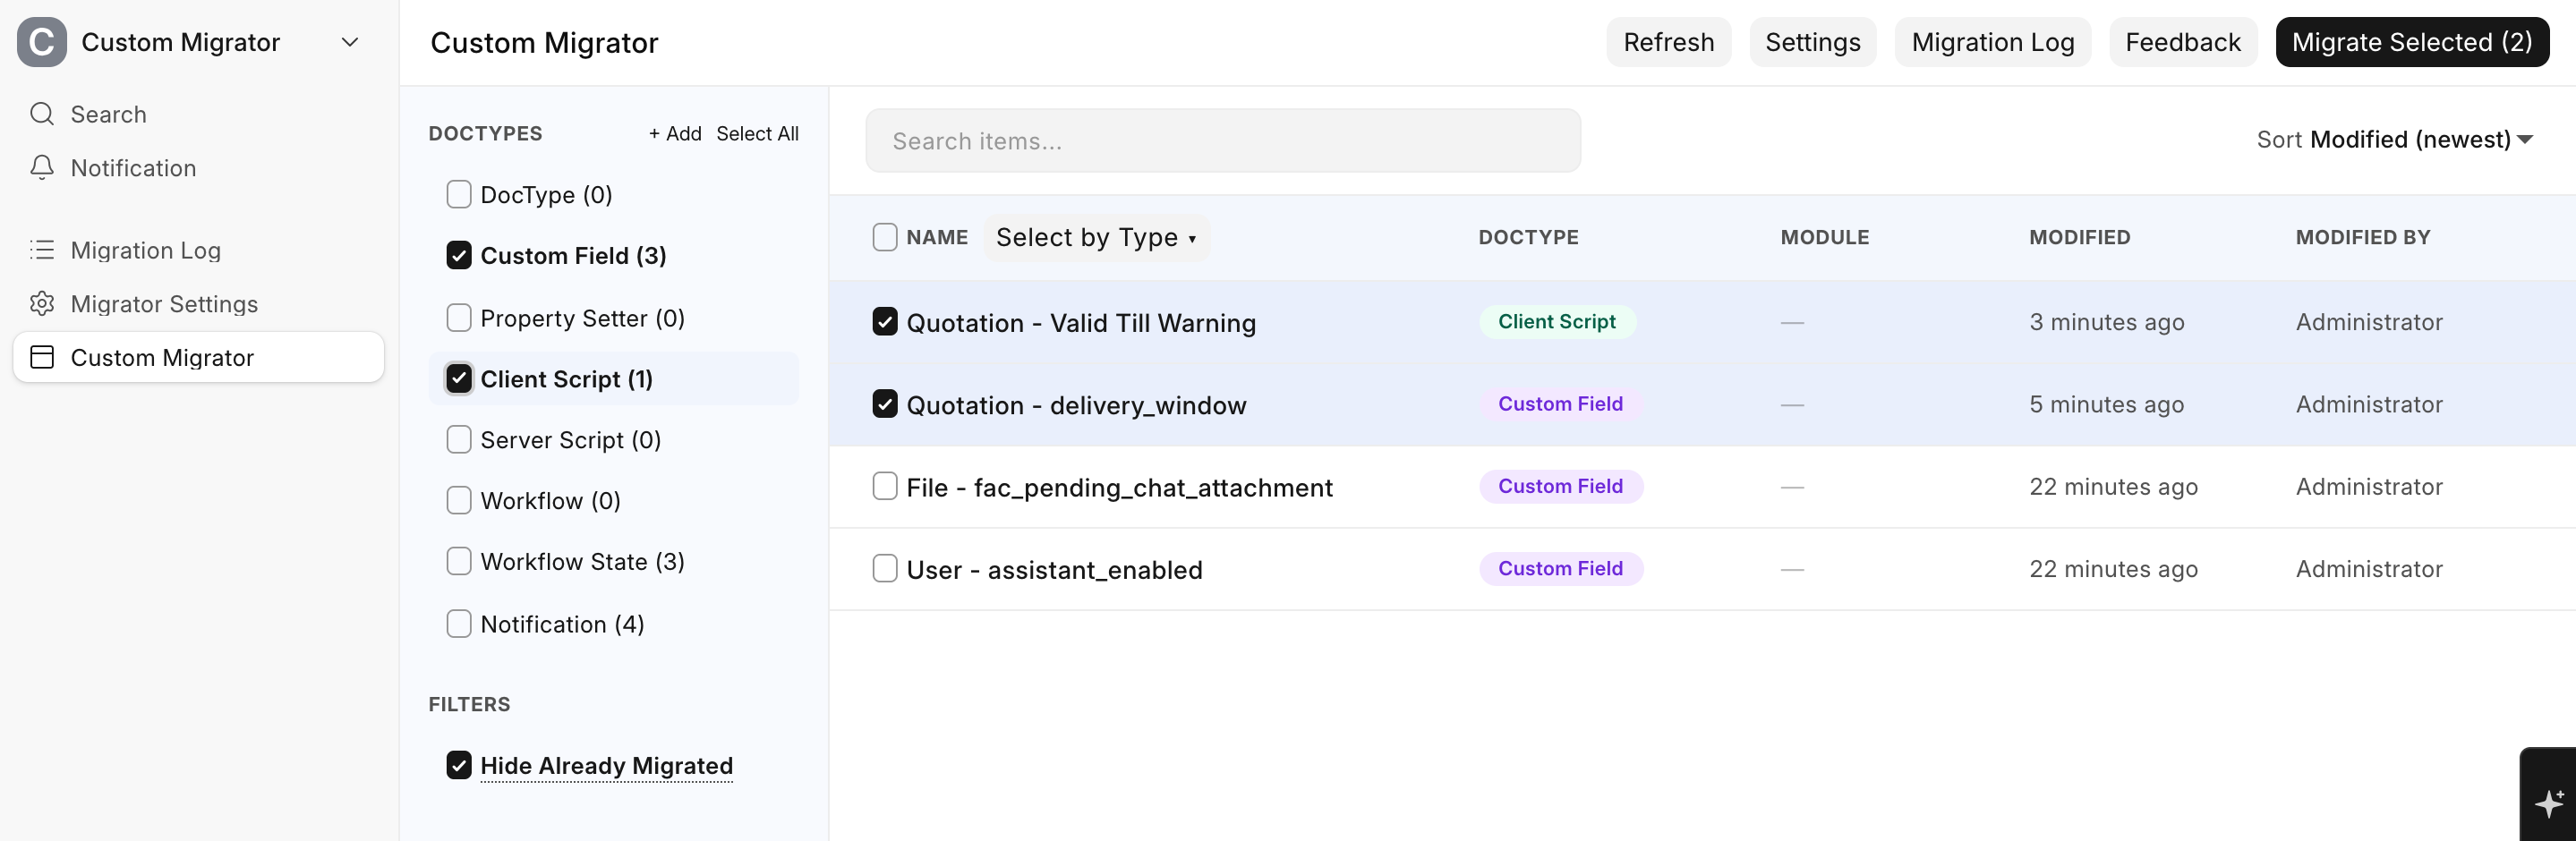
- The sidebar lists the types you track, each with a count. Tick several to see them together, or click a name to see only that type.
- Hide Already Migrated (on by default) hides records that are already in your base branch on GitHub, and records that come from other installed apps, such as ERPNext's own. Items hide once their pull request is merged, not when you push. A record you change later shows up again.
- The list shows up to 500 records per type, newest first, 50 to a page. Search items... filters the current page only.
- Refresh fetches the latest base branch from GitHub before reloading the list.
Pick what to ship
- Tick rows one by one.
- The header checkbox selects everything in the list, on every page.
- Select by Type ▾ selects or clears all of one type.
The Migrate Selected (N) button at the top shows how many you've picked across all pages.
Check the Export Preview
Click Migrate Selected. The Export Preview counts what's in your selection, per type:
- + NEW: not in the app's files yet;
- ~ MOD: in the files, but changed since;
- = SAME: already identical.
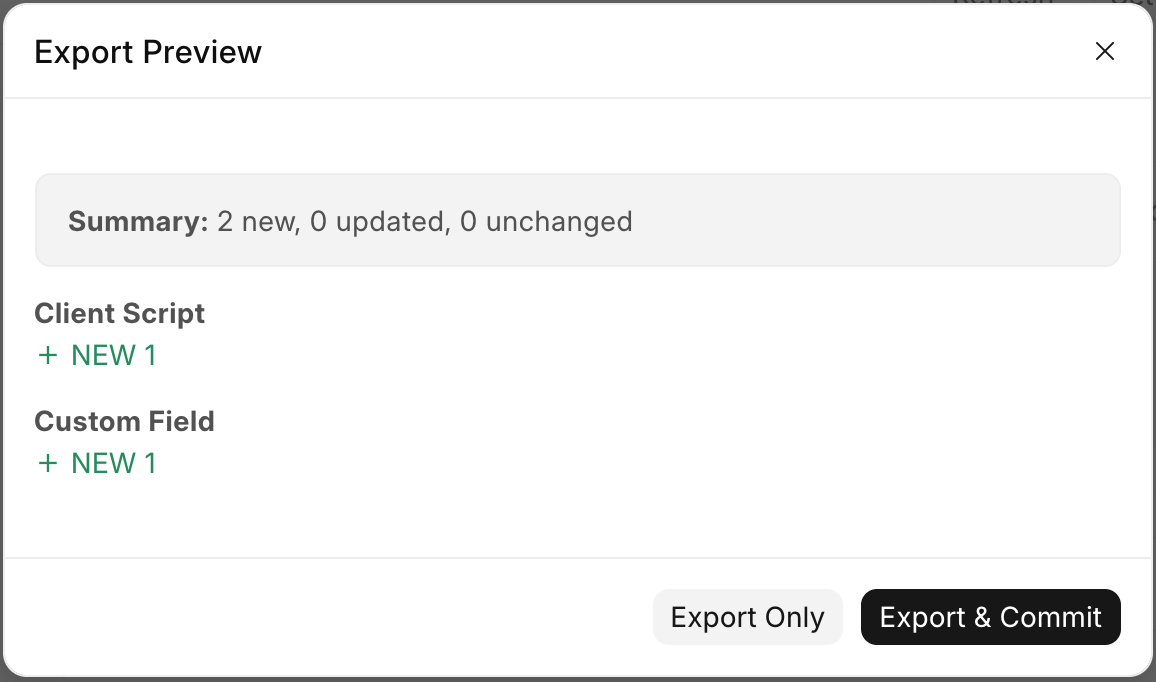
The preview compares against the copy of the app on the server. If that copy is behind GitHub, it can disagree with what the push finds. See Known issues.
Then pick:
- Export Only: writes the files into the app folder on the server, without committing or pushing. Useful for checking the files yourself.
- Export & Commit: opens the commit dialog.
Commit & Push
| Field | What to put |
|---|---|
| Select Branch | Create New Branch (recommended) or an existing branch |
| New Branch Name | Filled in as migration/YYYY-MM-DD-HHMMSS. Letters, numbers, ., _, - and / only. |
| Commit Message | Lists what's new and updated. If HydraAI is installed, it writes the message for you from the actual changes. |
| Release Tag | Optional, such as v1.4.0. The tag must not exist yet. |
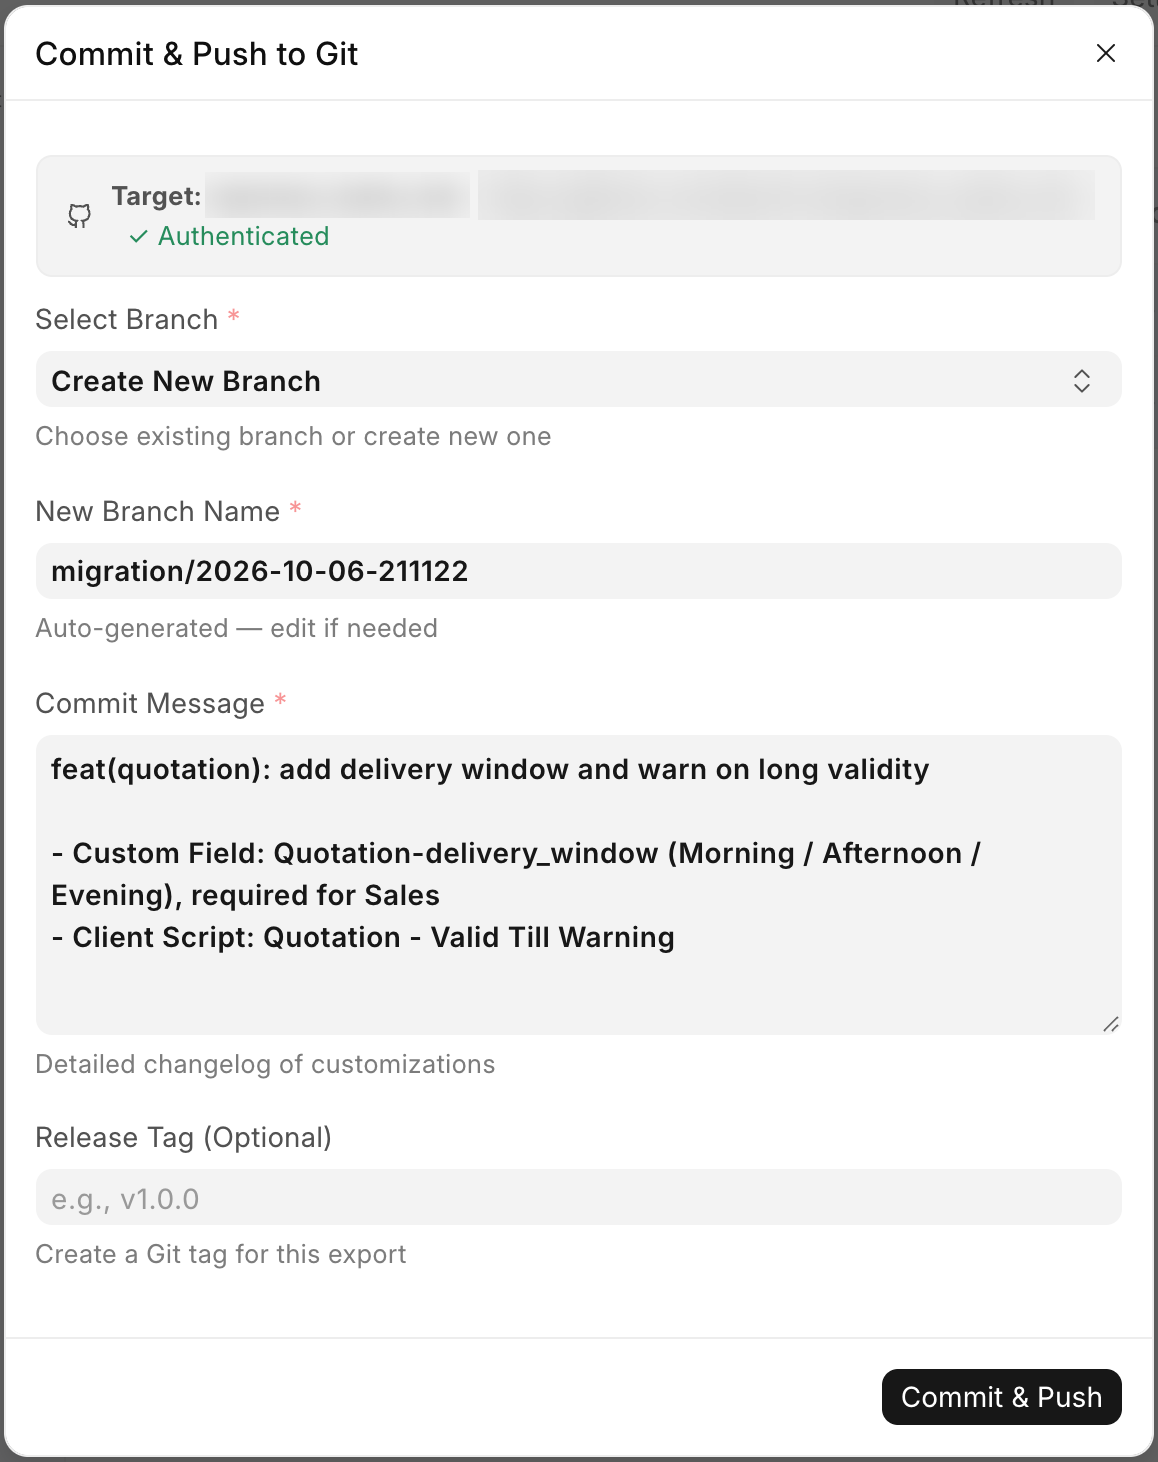
Click Commit & Push. The push runs in six steps, plus a seventh if you set a tag:
- Fetching remote
- Preparing branch
- Exporting customizations
- Committing changes
- Syncing with remote
- Pushing to remote
- Creating tag
If nothing changed, you'll see Already Up to Date and nothing is pushed. If it's still running after about three minutes, the dialog says Push Timeout. The push carries on in the background, so check the Migration Log.
NOTE
Push to a new branch each time. Pushing onto an existing branch that someone else has added commits to can be rejected by GitHub while Custom Migrator still reports success. See Known issues.
Open the pull request
After a successful push:
- If a pull request from that branch is already open, you'll see Pushed to Existing PR with a link to it.
- Otherwise the Create Pull Request dialog opens. The title and description are filled in, and you can change the target branch. Click Create PR, or Skip to open it on GitHub yourself later.
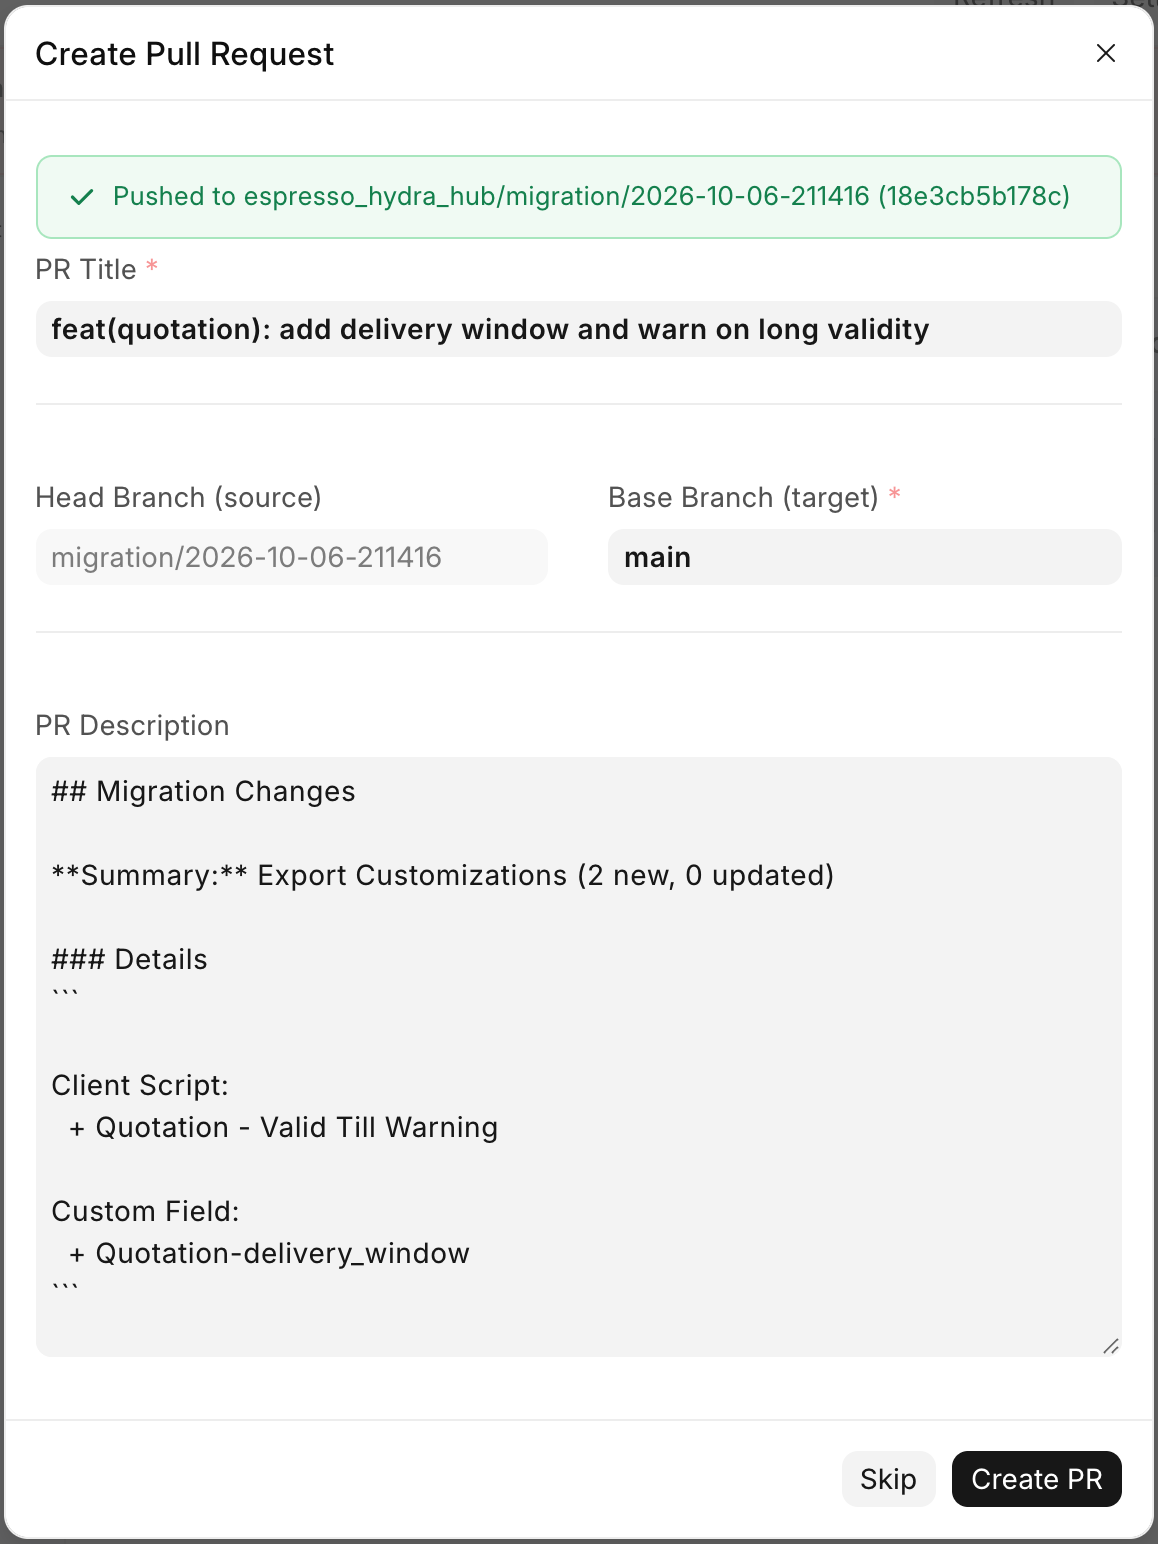
Pull Request Created links straight to it on GitHub. If the token can't open pull requests, you'll see PR Creation Failed. Your branch is still pushed, so open the pull request on GitHub instead.
What happens on the server during a push
- Only the customization files and
hooks.pyare committed. Nothing else in the app is touched. - Uncommitted edits in the app folder are set aside during the push and put back afterwards. Your own commits aren't touched.
- While the push runs, the app folder is briefly switched to the new branch, so avoid running
benchcommands on that app at the same time. - Commits are authored as your Frappe user.